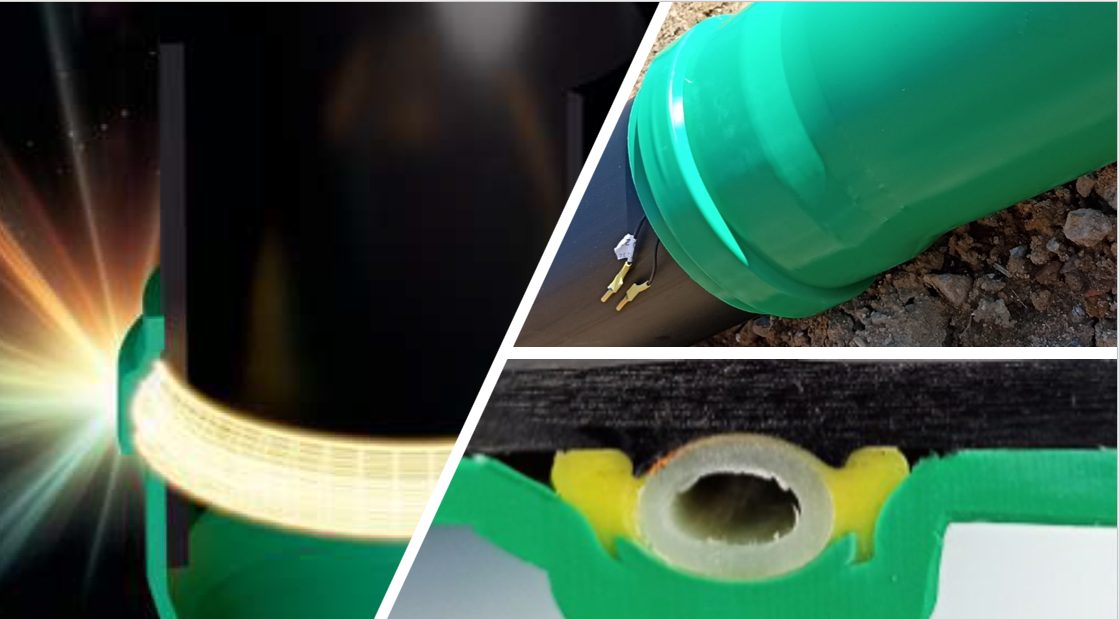
IP-PLUS welding ring
The consumable that stays in the joint. Selected by pipe system material and nominal diameter. Delivered in airtight packaging.

Welding system
The welding ring and the welding unit form a complete package for welding socket joints on site, without special components.
System parts
The consumable that stays in the joint. Selected by pipe system material and nominal diameter. Delivered in airtight packaging.
A fully automatic welding transformer that feeds the ring with the defined welding voltage and supervises the welding time. One unit serves the whole ring range.
Multi-Voltage
IP-PLUS rings are welded with the Multi-Voltage method: the welding unit defines the welding voltage and varies it during the weld. This keeps the processing window as wide as possible even as conditions, pipe size and ambient temperature vary.
The practical benefit on site is simple: the installer never selects parameters by hand or estimates the welding time. The unit runs the cycle and signals when it is complete.
Some unit models also weld conventional electrofusion couplings with the traditional heating-coil method, so one unit covers the whole site.
We are happy to advise which equipment configuration fits your use.
Installation
The sequence below is generic. Always follow the installation instructions delivered with the product and the welding unit's manual.
The pipe is cut square and the end chamfered. The chamfer helps the pipe slide into the socket past the ring.
The pipe end and the socket's inner surface are cleaned of dirt, sand and moisture. Cleanliness decides the quality of the joint.
The package is opened only at this stage. The ring is pressed into the sealing chamber in place of the rubber seal, terminals facing outwards.
The pipe spigot is pushed into the socket up to the insertion mark. The pipe must be in straight alignment with the socket.
The welding unit's cables are connected to the ring's terminals and the cycle is started. The unit controls voltage and time automatically.
The joint cools unloaded for the specified time. It is then inspected visually and the line can be backfilled.
Welding cycles are worth recording in the project's quality documentation: joint ID, ring size, date, installer and the unit's confirmation. This keeps every joint traceable for the lifetime of the line.
Tell us about the project and we will go through the installation requirements and equipment configuration.